This tutorial is based on free-form stone carving where there are no restraints regarding the finished artefact such as those associated with architectural or restoration carving. The techniques described here are designed to give a general overview of the basic methodology needed to start carving stone.
The Stone Carving Process
The process of carving stone from initial starting point to finished artefact follows a loose pattern of steps. These steps can be broadly categorised into the following:
Identifying A Starting Point
The starting point of the stone carving process is largely dependent on two factors; the initial shape of the chosen stone and the perceived outcome of the finished artefact. Other factors to take into consideration are the physical size and weight of the stone which could necessitate special handling requirements.
If working from a maquette, drawing or existing design then the starting point centres around identifying the outer dimensions of the piece and transferring these measurements to the stone using calipers or other means of measurement such as a tape if the stone is dimensional and has flat surfaces suitable to draw on.
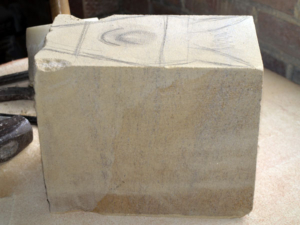
For this tutorial the stone being worked is Ancaster limestone, quarried near Lincoln in Lincolnshire. As can be seen from the picture the stone is dimensional.
I’ve started by marking off some of the main areas to rough out. I’m not using a maquette or an existing design for this example, instead the idea is to explore ideas as I go along.
Initial Roughing Out
The stone being used for this example is soft and easy to work, therefore this stage is done using a half inch claw, mallet and small lump hammer. Referencing the previous picture it can be seen that the original markings on the stone have denoted the position of the eyes, nose, tapering of the mouth area and the beginnings of the upper part of the carving. At this stage the bulk of the stone has been left alone simply to maintain the weight and stop the stone from moving about during the roughing out process.
Creating Form
The following pictures demonstrate the creation of form in the carving.
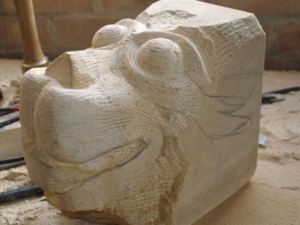
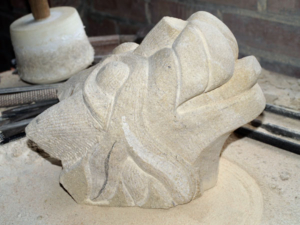
The back of the carving has been cut off to push the profile of the head forward. Even though a considerable amount of material has been removed at this point the piece still has enough contact area with the banker to stop it from moving around during carving. The profile of the neck is also starting to be developed. The profile of the mouth and jowls has also been created.
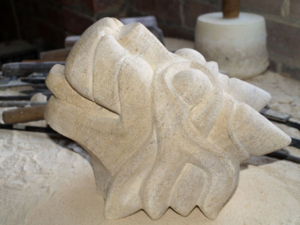
The neck area is developed further to introduce the profile of the lower jaw. The area behind the eyes starts to be worked into stylised flames to suggest some kind of mythical beast. The horns on the top of the head are also roughed out, again, using the half inch claw. Click on the image to view a larger version.
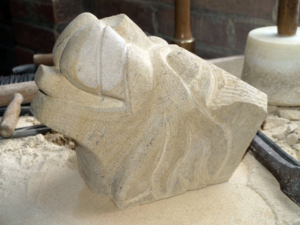
Adding Detail
The next stage is to add more detail to the carving. During this stage the flames behind the eyes have been developed further to add shadow and depth to the piece. The scissors of the jaw have also been taken back slightly to bring some movement to the mouth and surrounding area. Further development involves creation of the horns and more detail added to the flames and under the eyes to increase shadow and depth.
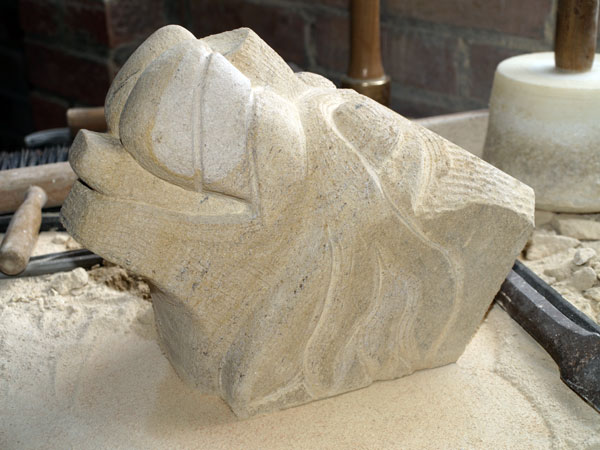
Finishing
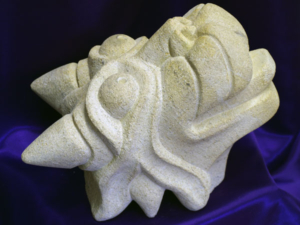
The finishing stage involved creating the nostrils and detailing of the eyes – this was achieved with a quarter inch bullnose spun between the palms of the hands to create a drilling motion. There are many types of finish that can be applied to stonework, for this example I finish the carving by tooling it over with a three-eighths inch flat chisel, quarter and half inch bullnose, and dummy to remove the claw marks. The piece could have been finished by rubbing down with sandpaper but I prefer the finish achieved by leaving it on the chisel. Due to the softness of the stone combined with the moderately harder shell content, rubbing down would have resulted in an uneven surface.
A PDF version of this page is available